Sunday, June 9, 2013

How On Earth Do I Know My Hair Type????

If you're anything like me, you are confused by this hair typing system often referenced to by hair bloggers and vloggers across the nation. I had only been a few weeks into my natural hair journey when I realized that part of "going natural" was being able to assign a number and letter to your curl. Fortunately, three years later, I have been able to decrypt a system that once boggled me and should be able to help those of you who have no clue what your hair type is.

Essentially, the hair typing system is a 4 point scale, further divided into letters a to c. Type 1 hair is the straightest hair and most common, naturally, among Asians. I have yet to see a black woman born with bone straight hair, so that's all the reference I am going to make to Type 1 hair. Type 2 hair is wavy hair. The hair is neither straight nor curly but floats in the middle ground. This look and straight hair have become the most sought after hair types in recent years.

The four hair types from left to right: Type 1 (straight), Type 2 (wavy), Type 3 (curly) and Type 4 (coily). At the very least, you should know what number you fall into. 
The next hair type is Type 3 hair, which essentially, is the curly hair. This hair type is not uncommon in the black community. Let me remind you that I am talking about hair in it's natural state, with rolling, curling, flat ironing, relaxing or any other form of styling. Type 3 hair is most often (though not exclusively) seen on bi-racial people who have some black heritage. Again, it's seen in other races. Curly hair ranges from loose curls (Type 3a curls) to really tight curls (Type 3c).

Finally, there is Type 4 hair. It's basically the coily hair. This is the hair type that is most common (though not exclusively) seen on black people. The term "kinky" was coined for it several years ago, and it has been branded by many as dry, wild, stunted, undesirable and unmanageable. Turns out it's not any of those things but dry. Your hair type is determined by the shape of your cuticle, which is why it's congenital. The shape of Type 4 cuticles results in tight coils, which are more prone to shrinkage and make it difficult for the sebum from sebaceous glands on the scalp to reach the tips of a hair strand. Why is that problematic? Well, sebum is a waxy substance every human being produces to lubricate the hair and keeping hair lubricated strengthens the entire shaft of hair. The result of poor sebum distribution on hair is the hair ends up dry and fragile. That is why people with Type 4 hair struggle to retain length. The hair grows just as rapidly as other hair types but the older, dryer ends of the strand break off. It's a vicious cycle that many are unaware of. You may be surprised to find that Type 4 hair can even be found naturally on white people.  It was more common to see a white woman with a frizzy head of hair decades ago, simply because, like black women today, they go to incredible lengths to hide it. 

Finding a white person with afro
textured Type 4 hair is possible,
but rare. White women with this
 hair type go to extreme lengths
to change it.
Type 4 hair is further divided into 4a, 4b and 4c. This is where it gets complicated. Identifying which of these three you are is challenging because the differences are subtle and many of us have never taken the time to look closely at our natural hair. I always tell the story of my sister and a friend of hers called Lynn. They are both black. A year after I went natural, my sister followed suit. Like me, my sister had no memory of her natural hair since we both had our hair relaxed at a young age. She loved the results. After her big chop, she pranced around for months with a well-cared for, unparalleled TWA. She was a junior in college and had the cutest coils. She was no stranger to compliments on her hair, people of all races seemed fascinated by how "bouncy" her hair was. One day, a black man ran after her as she left the library and said, "I'm sorry. I have seen you around a few times and didn't want to approach you because I thought it would seem weird. I really want to know how you get your hair to look like that. My wife straightens her hair and I'm always telling her there's this girl at school with the nicest hair and she should try to style it like that!" Just like that, my sister walked away with one of the most unexpected compliments she had ever received. On another day, she was with Lynn, when Lynn said, "I really like your hair... I can't go natural. I know my afro would never look like that- so curly." The problem is Lynn had never really seen her natural hair. Chances are, with a little TLC, her natural hair would look way better than she expected.
It's important to use this illustration when determining your
hair type. 

Now, back to the crux of the issue: what's the difference between 4a, 4b and 4c. They are basically a scale. Type 4a are the loosest coils and closely resemble curly hair but tighter. An afro of 4a hair will look like curly hair with a lot less definition and more frizz. Type 4c are the tightest coils. I am 4c. To determine that I looked closely at a strand of hair near the crown of my head after I had deep conditioned and had a damp head of hair. I didn't strain the strand since that would lead to a looser coil than I naturally have. It is important to note that some people have two types of hair on one head. The hair type on the crown of their head differs from that on the edges of their head. If that's the case for your, accept that. You are Type 4b/4c or whatever the case may be.


Wednesday, May 29, 2013

You Don't Need to be a Pro to Deep Condition

Last night, as the clock struck 11 pm, I steered in the direction of bed. It had been a long day at work, it rained on my way home (the ultimate downer) and it was late. Yes, there was a lot to be despondent about,
Deep conditioning will make both you and your happy and
you will be able to restore your hair's natural curls.
Pictured is Ebony of blackwomennaturalhairstyles.com
yet, ladies, I felt so incredibly relaxed. I called my boyfriend to say good night and I attempted to explain why my head felt so good. I'd just had my weekly hair wash, but this time, I went the extra mile and deep conditioned. Prior to this ritual, my hair felt tired, dry and strained. Deep conditioning was much needed, and if you want strong hair, you will start recognizing when your hair needs it too.

"My scalp feels so cool... so revitalized," I tried to explain to my boyfriend over the phone, and he laughed at me because prior to dating me, he never had casual discussions about hair care developments. Lost for words to describe the inexplicably refreshing sensation that the conditioning had left my scalp and hair in, I paused mid-sentence. Then, as if he took the words out of my mouth he said, "It's as if your hair just got washed by a cloud..." EXACTLY!!!

A plastic hair cap, sometimes
 referred to as a plastic hair
processing cap, is used during the 
waiting 
period to cover the hair saturated in 
conditioner. I don't even bother 
purchasing those plastic caps and just 
use a plastic grocery bag. 
As ridiculous as the last paragraph sounded, it's an actual account of the conversation I had with my boyfriend- provided not only for your comical relief, but also for your education. Deep conditioning is not something that requires expertise. It's something that should already be a part of your hair care regimen. Like all other good things, it minimizes breakage, softens brittle hair and restores moisture and elasticity. Two weeks ago, I took down some crochet braids and made the disheartening discovery that the Garnier Fructis Sleek & Shine Intensely Smooth Leave-In Conditioning Cream I had long been using for light-duty moisturizing is absolute rubbish (at least on my full head of hair). Two weeks and two deep conditioning sessions later, my hair is where I wanted it to be. It feels good.

Fortunately for you, there are multiples ways to go about deep conditioning your hair. You don't even need to run out after reading this article and purchase a $500 "deep conditioning mask" to do it. Behold, Nubian princesses, your options:

1) Generic Conditioner. This has to be the most convenient method of all. Just use the conditioner you have been using for your regular washes. Instead of rinsing it off after a few minutes in the shower, leave it sitting in your hair, covered with a plastic hair cap, and go about your business around the house. I often go watch a series of YouTube videos or some episodes of my recent TV fad. Additionally, I have what I call my small "conditioning towel", exclusively used for deep conditioning. I wrap it around my neck and dab away at water that seeps out of my cap. Forty minutes to an hour later, I return to the shower to power wash the conditioner out of my hair.

2) Greek Yogurt Deep Conditioner. This is the best treatment for dry hair and while there are many recipes out there, I highly recommend Naptural85's. I'll let her explain it all to you, but if you are pressed for time, it's all summarized underneath.


  •  The treatment can be done on any day and does not require shampooing first. 
  • The DIY conditioner is made of 2-3 tablespoons of natural whole or 2% plain Greek yogurt (any brand), enough lavender essential oil to mask the yogurt smell and 2 tablespoons of apple cider vinegar. 
  • Application of the yogurt mix is first done by sectioning the hair into 4-6 parts. Working part-by-part, the yogurt is smeared onto the hair, starting at the end to about 3/4 up the hair. 
  • DO NOT apply yogurt on the hair near the scalp. It should never come in contact with your scalp. 
  • Cover with cap and wait for 20-25 minutes.
  • Rinse each section under the shower (never allowing yogurt to come in contact with scalp)
  • While under water apply a small amount of conditioner and rinse it out immediately. 
  • Before re-twisting the rinsed, conditioned hair section under water, apply a small amount of aloe vera juice and twist. 
3) Egg and Mayo Deep Conditioner. Again, there are several different recipes for this. I recommend Naptural85's, and I have pasted her video below. The Egg-Mayo conditioner is the ideal treatment for restoring protein and getting back that hair elasticity. I personally do not use it because I can't stand the smell of eggs and mayonnaise, which, if conditioning is done well, should not linger. I can admit, though, the benefits of it are clear.
  • The ingredients of the DIY egg-mayo conditioner are 2 beaten eggs, 6 tablespoons mayo and 1-2 teaspoons honey. 
  • Start by shampooing the hair, rinsing it and applying a 3:1 water to apple cider vinegar mix. 
  • Apply the DIY egg-mayo conditioner to all the hair, ensuring it's all covered. The hair can then be covered with a plastic hair cap for 45 minutes and rinsed out afterwards. 
  •  Sectioning the hair for conditioner application must be done for medium to long hair, but is not necessary for short hair. 
The hot oil treatment is made with a
combination of essential oils. Which oils
you use is a matter of preference, but it's
best to watch a few YouTube videos to
get a rough idea of what kind of ratios to
mix your ingredients in. 
4) Hot Oil Treatment. This is the ideal treatment for adding shine to your hair. It is basically the application of a mixture of oils to the hair and then warming of the oils for 20-30 minutes. There are multiple oils that can be added to your hot oil treatment. Typically, a combination glycerin, coconut oil, jojoba oil, castor oil, rosemary oil, olive oil, and many other essential oils are used. It's a matter of personal preference. Post application of the oil mixture, a hood dryer or a conditioning heat cap is used over a plastic hair cap to warm the oils. Caution is necessary since oils warm up faster than water (heating should be low to moderate). The hair is then shampooed and conditioned.


Those are just four deep conditioners you can do at home. There are many more. The type to use should be determined by your hair's current needs. When in doubt, out of supplies or broke, then the generic conditioner method is the answer. Deep conditioning with your normal conditioner can be done as frequently as desired, and while the other three are for "special occasions", your normal conditioner will always be there. 

Tuesday, May 28, 2013

Plants Don't Thrive in Deserts (Hydrate Inside and Out for Healthy Hair)

We have all heard the implausible prescription of 8 glasses of water a day. Some of us have tried it, most have decided it's not even worth the effort. You really don't get more impractical than a physician, do you? Eight glasses?! Well, ladies. Turns out hydration is vital for healthy everything. There are a lot of women out there
No water- no life. You
can't  be dehydrated
for weeks and expect
healthy hair.
trying to find quick fixes for poor skin and perpetually-brittle hair, but they are bound to be no more successful than a man trying to make a rock taste good by putting icing on it.

The first step to long (or short) healthy hair is a good diet and HYDRATION. The latter, hydration, is most often overlooked. I have often wondered why it's so hard for us to hydrate our bodies, when the benefits are so clear. It's because it's inconvenient. We're too busy to find a vending machine and buy a bottled water, we no longer trust the water fountains (what's been on them and the quality of what sprouts out of them) and by the end of the day, we've left too little time to get our glasses in and actually enjoy them. Yet another day goes by with one glass of water or less and, yet again, your hair must battle the rest of your body for the limited supply of H2O.

I'm not pretending to be the best at continuous hydration. I empathize with all of you. However, there are some solutions you should consider. Abandon the bottled water. Ironically, they are more likely to discourage hydration than promote it. Here's why:

  1. If you buy bottled waters from vending machines, you have to spend money to get each one. On days when you are strapped for cash (or change), you are actually less likely to drink water. The result is  a correlation between financial stability and outward appearance (I extrapolate, of course). 
  2. Unless you have a portable vending machine, you drink less on days when you are over-scheduled and busy. That, you can imagine, is not a good combination: stressed and dehydrated. 
  3. The alternative solution of buying bottled water in bulk is both uneconomical and "heavy". I know what you're thinking: "Midori, isn't bulk and uneconomical an oxymoron?!" Yeah, but there are exceptions to every rule and this is one of them. Anyone who has replaced the regular purchase of bottled waters (in bulk) with a Brita filter jug will tell you that they saved a lot in the long run. Alternatively, if you went the extra mile and decided to carry three to four bottled waters to work you'd quickly realize that carrying bottles of water around is far from fun. There's nothing glamorous about a hand bag crammed full of stuff (even if the stuff is really healthy). 
  4. Finally, bottled waters are just not eco-friendly. Annually, the US disposes of enough plastic bottles to circle the earth four times. You may not be responsible for that as an individual, and you may argue that you alone cannot make a difference. However, we are in this environmental tragedy because there was no individual accountability to start with. It starts with YOU. 


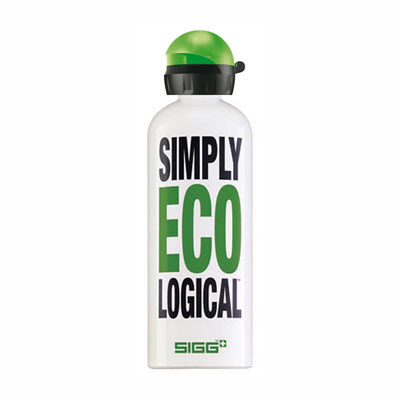
Try to drink several bottles a day. A reusable bottle saves.
Avoid BPAs and bottles with mouth parts that are difficult
to wash. 
You might be wondering what the best course of action is then. The first thing I recommend doing is getting a Brita filter jug, if you are uncomfortable drinking tap water. I grew up drinking filtered water in my parent's house, and though now I am confidant that there's nothing terribly wrong with my tap water, habit hinders me from drinking it without filtering it first. The next course of action is to invest (yes, it is an investment) in a reusable drinking bottle. I must emphasize the word "REUSABLE". "Reusable" is not a Poland Spring Water Bottle you bought last week and finished (that's just gross and will begin to look gross in a couple of days). "Reusable" are those BPA-free empty drinking bottles you can buy in stores. They cost the equivalent of 3 or 4 bottle waters from a vending machine, but save you a ton more. There are also Brita bottles you can buy to filter on the go. Selecting your bottle may turn out more complex than anticipated. There are a lot of options. Be wary of water bottles with straws in them or with sport caps (that you suck on), because they are harder to clean. What may appear
intricately designed could be more for show than function and within weeks, you will be culturing several species of fungus in those hard to reach parts of the bottle. I always  buy reusable water bottles with wide mouth pieces that I can get a sponge through if need be. Once that investment in a good bottle is made you'll have one bottle to carry around and you can replenish, replenish, replenish some more.

Embrace reusable bottles
If you are anything like me, then you aren't too fond of the taste of water. I mean, on a hot day, everyone loves a cold glass of lemon water, but after two I just feel bored and full. Then, try getting beverage mixes like crystal lite. Crystal lite sachets are a constant part of my weekly budget and enable me to drink 20 ounces of water in a few hours. I must admit, I am sucker for flavor.
Abandon bottled waters. Their bad for your pockets
and the environment.

At this point, you may be kicking yourself for reading an entire article about a water bottle, but maybe this was the kick you needed to drink more.... water, not alcohol. I must reiterate, one of the most important keys to healthy, moisturized skin and hair is hydration.

Saturday, May 25, 2013

Poor Leave In Conditioners (Who I Won't Be Using Any More)

Your hair should NEVER feel brittle. That's a red flag. If you're
using a product that dries your hair and makes it feel course,
it's time for a revision. 
So, almost a year ago I wrote a blog post on leave-in conditioners. I discussed the importance of them in every hair care regimen, reminding you all that Afro texture hair will never be "independent". We are forced to take the time to nourish it, when many other hair types aren't. For an entire year, I used and highly recommended Garnier Fructis Leave-In Conditioning Cream. Those days are over. It's one product that no longer works for me.

I recently took off my crochet braids and, as always, had to put in hours of detangling and thorough washing. I decided it was high time to walk around with my natural hair- give it a break from the braids (with protective styling of course). What I was not prepared for was the revision that my hair product collection would need. Garnier Fructis Leave-In Conditioning Cream once worked for me, but after washing my hair, deep conditioning, applying the leave-in conditioner and topping it off with jojoba oil to seal in the moisture, I realized that it would not be the ideal leave-in conditioner for my exposed natural curls. Withing 20 minutes, what had been soft and moisturized dried to a crisp. I kid you not. I even tried to reapply it and seal it in again and that yielded no better results. At a loss, I went to YouTube to find out what the reviews on the product were (something I should have done a year ago- before I started using it). Some natural hair vloggers claimed that it was the perfect product, but many argued that once you go natural it is not effective. It was then that I started reflecting on why it took me so long to find the same thing. For a year, my go-to protective style was crochet braids. They allowed me to wash my hair weekly and I would use the Garnier Fructis Leave-In on the little hair, near my roots, that was exposed. Anyone who knows the chemistry of African hair knows that it is actually the hair closest to the roots that is the best nourished, strongest and least in need of moisturizers. So I was unaware that it would evaporate within minutes of being applied to my unbraided natural hair.

This leave-in conditioner no longer works for me.
Presently, I am looking for a better leave-in conditioner. I was lamenting the brittle state that Garnier left my hair in to my friend when she said, "Black women need to stop being surprised when products designed for Caucasian hair don't work on theirs." She is absolutely right! I now plan on using Giovanni Leave-In Conditioner, one of the best leave-in conditioner, and will be sure to post a personal review.

Transitioning is difficult. Let's face it women, there is a very steep learning curve when you start to go natural. If I received a penny for each time I had to abandon a product I once thought was good, I would be a millionaire. My advice to you natural belles that might be experiencing the same thing: keep on trying. Taking the time and effort to assess and reassess will ultimately be rewarding- that's what's keeping me in the game.

Monday, March 11, 2013

Growing Long Natural Hair with the Goldilocks Hair Tactic

Too Little or Too Much Hair Attention

I call it the Goldilocks Hair Tactic and it's something we should all adopt. We struggle to find the middle ground when it comes to giving our hair the adequate amount of attention. For decades black women have scorched, stretched, crimped, relaxed, plaited and twisted their hair in an effort to look "strikingly beautiful" and, at the same time, induce growth. It's no wonder why in black communities our real hair is widely perceived as brittle. "It just doesn't grow, so I relax it to make it look longer," a lot of women will tell you as they sit in a salon getting their monthly perm. What they need to realize is that it's no wonder. They're all hacking away a tree trunk with an axe,  not expecting the tree to fall. There are only so many ways I can word this ladies, we are straining our hair way too much and it is high time we stop.


Protective Styling and Time
Crochet braids are great protective style- a personal
favorite.
You might be wondering why I brought up the Goldilocks Hair Tactic. I have been natural for almost 3 years and I have used crochet braids as a protective style for about two years. My crochet braids kind of define me, because I so rarely have my natural hair exposed to the elements. When I decided to go natural, I quickly learnt the importance of protective styling. As cute as that afro is, in the long run, it leaves you susceptible to tangling and hair breakage. Low maintenance and speed made crochet braids appealing and, well, I never looked back.

This weekend, I removed two-month old crochet braids and was taken aback by the length I had gained underneath them. I've often heard natural hair gurus say that if you want your hair to grow you need to "leave it alone and give it time". Last night as I touched my 100% natural hair, I fully understood the value of that kind of treatment. Three years after my transformation, my natural hair has reached the maximum length that I obtained when I was relaxing- all without sodium hydroxide, flat-irons chemical burns. The added accomplishment there is that the hair is still growing. There are plenty of concoctions for hair growth on the market, but the best word of advice you will ever receive is to leave that hair alone!

For those of you wondering what my natural hair looked like yesterday. It's
possible to grow long natural hair - I am doing so inexpensively.
Regular Washing and Moisturizing
That being said, there are some ladies all too willing to follow my advice- some who have taken it to an extreme. The problem is, complete abandonment will not get you far in your natural hair transformation either. In fact, both natural belles and permed divas are blameworthy here. All too often they get some weave and completely neglect their real hair for months. As the saying goes: "Out of sight of mind". If you have done this, it has to stop today. When I say leave you hair alone it is only to dissuade from the tugging, pulling and burning. That in no way condones the failure to wash your hair WEEKLY (yes weekly!) and keep it moisturized with water or a good leave-in-conditioner and a serum. Neglect will leave you with a mass of hair that needs to be concealed- it almost becomes a secret shame. On the other hand, with a little bit of care, you'll have the option of tucking a mass of lovely natural locks under your protective style or flaunting them out in the open. I don't know about you, but that seems like a no-brainer to me.

Friday, August 24, 2012

Making Up Your Mind on Mascara

There are countless mascara choices!
There are myriad options when it comes to mascara and all novices are overwhelmed by this. I have never been the type to coat my face in layers and layers of makeup, however, I believe that every should have a little mascara. To add to that, she doesn't only have the right to a little mascara, she needs the right mascara. You and I could explore the many types available for you to buy and some I would never recommend because of personal taste,  but ultimately, the choice is yours.

The Color of Your Curl

Black mascara is the most
dramatic
The most common mascara colors are black and brown. That makes perfect sense when you think about it because, at least in this part of the world, those are the two most common natural eyelash colors. One of my closest friends has strawberry blond hair and her eyelashes have always been borderline red. Every morning she goes into her bathroom and uses black mascara. That's what she likes, and I will admit, darkening her long is the perfect way to flaunt them. Black looks could on everyone. So goes the saying for dresses and so goes the saying for mascara. However, you might be wondering what the point of brown mascara is. Well, to the trained eye, black mascara, even on ebony belles is a dead give away. Those aiming for a "natural look" will sometimes use brown mascara. It doesn't offer as much definition and contrast to the wearer but that's a trade off that some can come to terms with. Women who have fairer skin (of any race) and light colored hair that goes with it will sometimes use brown mascara because black is an exaggerated contrast on their eyelashes. In Contrast, there is also clear mascara. Of course, it is the most natural that you could look with mascara because it's not nearly as dramatic as black, brown or any other color of mascara on the market. One of the limited benefits of clear mascara is that it still lengthens the eyelashes and that's a benefit that all of us reap from our mascara.

Water-poof vs. Washable
Crying and looking pretty at the same time is
enough of a battle. Don't worsen your
stakes by wearing washable mascara. 

Now, the advantages to washable aren't as self-explanatory as water-proof. While washable mascara will run off with just about any aqueous solution, the most commonly used being water, water-proof mascara will not come off unless you use make-up remover or scrub really hard with soap (the latter's not advisable). I have always preferred waterproof mascara because eye-makeup remover is quite inexpensive and while many people use cotton balls or cosmetic cotton pads to apply it to their lashes, you could get away with using tissue. In addition to that, you will never be that girl who teared up on a pretty day and ended up with black tears marring her cheeks.

Sunday, August 12, 2012

Start Fighting Wrinkles in Your Prime

Out of sight, out of mind. Everybody knows the saying and it holds true to everything, including wrinkles in your youth. Nature's out to get your skin. The sun is out to get your skin, I know. Aging is an inevitable insidious process and like all insidious processes, it needs to be treated long before it is seen. Some people may argue that I am way too conscious of future wrinkles for a young women in her 20s, however, I am what you might call an investor- a person who understands that if you invest today, reducing disposable income now, you yield more later. Fighting wrinkles at an early age  starts with three things, in my opinion. Notice I said "starts" not ends.

1) Moisturizing all the time: I am not going to endorse any moisturizers. I actually use a very generic brand of moisturizer. Whether or not you moisturize, I believe, will always be more important than what you use. Moisturizing must be done after every bath or shower. Whenever I come out of the shower, I apply lotion to almost every part of my body, paying extra attention to the parts I know are more prone to drying up during the day. The critical areas (more so when the weather is cold) are your cheeks, your legs, feet and arms. Naturally, if you have oily skin, application must be sparse.

This is your skin each time you let it
dry (on a microscopic level)
Have you ever wondered why the skin on people's hands ages a lot faster than the skin on other parts of their bodies? It's because our hands are constantly getting washed and aren't moisturized as often. If you don't carry a hand lotion around in your handbag, you have got to start doing that. Whenever I wash my hands, even if it's away from home, I follow that up with my hand lotion.

Dry skin not only cracks, it also ages faster. Try to picture a river bed drying up and how it looks during a drought. You do not ever want to put your skin through that kind of stress. If you do not do that, your skin will look better when you're older.

Sunscreen's not only for the beach and it sure isn't only for
Caucasians
2) Sunscreen- no matter what race you are: The sun is a real aging accelerator. Everybody has heard that, but few people actually think about it. Women of color have an advantage over women of other races, and that advantage is melanin. It makes us darker skinned than everyone else, and a century ago, that was considered a bad thing. Now it's widely known that melanin, actually protects from the sun's UV rays, one of which, UVA, is responsible for wrinkles. Collagen is found in your skin and gives it elasticity. Unfortunately for all the sunbathers out there, UVA penetrates skin barriers and depletes collagen, leading to looser, weaker, wrinkled skin. Women of color enjoy the benefits of the natural sunscreen called melanin, but they could really boost their advantage by acting like they don't have it. Wear sunscreen daily. Don't slather it on like you're going to roast on the beach, but put some on your face, your neck and chest religiously and it will pay off. I go out of my way and use it on my arms and legs if they are going to be exposed. What you are doing is slowing down aging. It is better you do so now than when you are 39 years old and start to see the first few furrows on your forehead and crows feat. One way to cheat is to find a moisturizer with a good SPF (20+), then you'll be moisturizing and protecting from the sun simultaneously.

Your skin loves cold water, even if you don't
3) Don't wash your face with water that's too warm: Cold water is actually very good for your skin. Believe it or not, it decelerates wrinkling. I remember when I was 13 years old, my dad and I went to visit one of my aunts in the UK. I haven't seen her since then, but I remember back then she was one of those women in their mid-40s who looked 10 years younger. We'd been sitting at the dining table and the conversation took the direction of youthful looks. She turned my way and said, "You know, people always ask me what I do to the skin on my face. I'm not spending a fortune on it. You know why I look like this? It's because I have never once washed my face with warm water." I, of course, thought that was a little odd. I thought that was just an old wive's tale. Turns out it isn't. A little bit of online research proved me wrong. I started washing my washing my face exclusively with cold water when I started college. It was tough to stick to the cold water but you get used to it. It got to a point where splashing cold water on my face was the most refreshing part of my day. I am nowhere near old and still boast the best skin among my girlfriends. It's not all genetics. Thanks to this part of my skin care regime, I will hold on to that title for many years.

Minimized Hair Breakage with My Hair Washing Routine

Stop cutting corners just because
it's frustrating!
To those of you natural hair neophytes who are still struggling with the crippling tangles and hair breakage that comes with removing braids that have been in for a little too long or even just the hair washing process, you are about to learn how to minimize them- I did. Last night I removed my crochet braids and after years of cutting corners in my post-braid hair washing routine, I decided to follow all the steps of my "Detangle. Wash. Work It. For Natural Hair" post. I had forgotten how immediately gratifying it can be and wanted to share it with all of you. My natural hair has grown dangerously long. I say dangerous because you will find that the longer your hair gets, the more tiresome some of these hair washing routines become. It's a real test of patience to detangle, twist and re-twist ever-lengthening hair, but hang in there and you'll be able to avoid all kinds of damage.
De-tangling is a test of patience.
It's the easiest time to damage hair.

1) The detangling: the importance of applying a natural oil to your hair before even attempting to de-tangle was a lesson I learnt today. Typically, I have a handful of hair when I detangle with oiling the hair first, and for several years I convinced myself that it was all shed hair that had been trapped in my braids. While that is true to some degree. A lot of that hair is unintentional breakage. Natural oils, like the jojoba oil that I used today, give the hair slip and no matter how gentle you believe your touch is, they nearly half the damage your hair and wide-tooth combs do. I took my hair detangling and spent about two hours on it. Consequently, I had an eighth of the broken hair I used to see.

Divide and twist- that's the secret
2) Segmenting the hair and twisting segments: This is a repetitive process that absolutely must be done after detangling, after you shampoo and condition each segment and, finally, after drying the each segment and applying your leave-in conditioner. My hair was divided into five segments,  a number I thought was suitable for my shoulder-length hair. As your hair lengthens, fewer segments will be needed. I use Organix shampoo and conditioner, specifically the Cherry Blossom Gingseng flavor. I love the brand and would recommend anyone of the varieties of Organix shampoo and conditioner. I began by untwisting a segment while water runs over it. Shampoo was applied in a downward motion, clasping the hair between my palms, it was then rinsed off with running water and conditioner was applied. The segment was twisted and the routine repeated on each of the segments, making sure not to rinse any conditioner off the completed segments. I then allowed my conditioner to sit in my hair for 30 minutes, a crucial step for revitalizing your hair after its been in braids for a long time. Because the conditioner is not leave-in conditioner, it's imperative that it is thoroughly rinsed out. I did so by untwisting the segments, rinsing them and then re-twisting each of them individually. You know you have substantially minimized damage when you look at the shower drain and there's very little there, as was the case with me.

Some people cover their hair in satin scarves
as it dries. It allows you to get around and will
smooth down your edges but it slows down
the drying a little bit- not a terrible trade off. 
3) Plaiting the hair after leave-in conditioner's applied: this step is needed to stretch the hair. I had more plaited segments than twisted segments when I was washing the hair because I wanted the hair to dry rapidly. Increasing the number of plaited segments increases surface-area and if you remember your science lessons from middle school that cuts down on drying time. One thing I did before plaiting each segment was run my wide-toothed comb through the segment after the leave-in conditioner had been rubbed in. The leave-in conditioner has countless long-term benefits, particularly when applied with a serum to seal in moisture (I use Garnier Fructis Anti-Frizz Serum), but the immediate lies in the springy properties it gives your hair. That springy property translates into less hair breakage when you run your comb through it. Once your hairs in plaits, it should take about 4 or more hours for it to air dry. Some people like to cover it in a satin scarf so they can go about their every day business in the public eye. I always schedule my hair washing on a weekend, so I don't have anywhere to go and can leave it exposed in the house, doing chores or watching tv as it air dries.

I use Organix shampoo and conditioner. It has countless different varieties
and, more importantly, it's free of sulfates!


Tuesday, July 24, 2012

My Top Four Inspirational Natural Hair Videos

Change is good. Change is inevitable. But above all, change is difficult. When I was transitioning to natural hair I went into a knowledge-hungry frenzy. There wasn't one natural hair YouTube video that I wasn't willing to watch and, consequently I learnt a lot. I learnt who knew what they were talking about; I learnt who didn't. I remember watching a video by vlogger who claimed that the best way to wash your hair when you have crochet braid is to use an Q-tip (ear swab) dipped in apple cider vinegar and run it over parts of your scalp. Are you frikin' kidding me? Now, I know that was ridiculous advice, but the early transitioner makes some mistakes and those mistakes have repercussions. When the going gets tough, you need a reminder of why you decided to go natural in the first place. These inspirational videos helped me, and to this day, are among my favorite natural hair videos:

1. Black Women with Natural Hairstyles...


2. Natural Hair Inspirations and Hair Styles


3. Natural Hair Inspirations 2012


4. The Coil Review Commercial - Natural Hair is Fabulous (this has to be the funniest. LOL!)


Saturday, July 7, 2012

Eight Reasons to Be a Natural Belle

 Big chop baby!
If you want a protective style that
gives you straight hair, try flexistrand
1. You were made that way
2. You won't be running for cover when the rain comes down. Hair shrinking back to its natural state is every relaxed-hair girl's nightmare. It's akin to a full moon in a werewolve's eyes. Ever noticed how calm real wolves look towards the end of a lunar month?


3. More people love natural hair than you realize. My roommate transitioned to natural hair a year ago. We go to a university that has a minority percentage of 19% and a black percentage of just 3%. In such an environment, it can become easy to conform to extremely western standards of beauty. Many African-Americans, if asked what kind of hair is considered beautiful by Caucasians would answer "long, straight hair or hair with loose waves". Weeks into her natural hair transition, all my roommate would wear was weaves. One day, she decided to bare her natural hair and got countless compliments, from boys and girls, on her "fro" like hair. If people outside our race appreciate the beauty of black natural hair, we should too.


Why would you relax this little girl's
hair? It's adorable. 
4. You hair won't thin as much as relaxed head of hair does. Remember what I explained about the fragility of African hair in my Leave-in Your Leave-in Conditioner post. Our hair is the extremely brittle, particularly when moisture-deprived. Relaxing your hair exacerbates that problem and that's why straightened relaxed hair is often thinner than straightened natural hair. As long as you care for your natural hair, gaining length will become easier than when you had relaxed hair.


5. You have a unique curl pattern to show off. Every natural head of hair is unique. That is even true among people with the same hair type. Stop selling yourself short.


6. No one enjoys bragging about fake hair. No matter how good it looks, there's always going to be a morsel of shame in artificial beauty. When a woman praises her weave in public, she often wants people to believe that it's her real hair.


7. There are so many different hair styles you can do with your natural hair. Think about the limitations of having a weave. There are only so many hairstyles you can do without exposing your tracks. It's crippling. With natural hair, no matter how many parts you make, where you part your hair, if the hair tied up or sleeked back, there will always be a healthy scalp underneath it, attesting to your hair's legitimacy. Think about the limitations of relaxed hair. You can't rock the afro or really curly hair on a whim without "ruining" the hair.


The beauty of relaxed hair is it can be both curly (left)
and straightened (right). The woman in both pictures
is Kim Love of Kimmaytube (natural hair guru). 
8. You haven't taken straight hair off the table: You can actually straighten natural hair to get a mock-relaxed hair look. In addition, it comes with a bonus: thicker straight hair. Should you choose to straighten your natural hair with a flat iron, a good heating serum is indispensable. That is too avoid heat damage to the hair, something that has long term consequences to natural hair-it will never be same. Flat-ironing your natural hair should also only be left for special occasions. I recommend doing it a maximum of 3 or 4 times in a year. The rest of the year, be spontaneous and try out different protective styles. Try to keep your relaxed hair stretched most of the time. Otherwise, flexistrand extensions are a good style that allows you to flaunt straight hair while protecting your fro.


Friday, July 6, 2012

A Little Inspiration to Get or Stay Natural!

The problem with natural hair is the same problem
facing our natural rainforests, our ice caps and threat-
ened species all over the planet. Everyone admits they
  are beautiful but few are willing to make the
 sacrifices necessary to protect and care for them. 
So,
 we continue on with our destructive ways, we 
call
 them progress...modern...and we convince our-
selves that destruction is as inevitable as breathing.
They say there's a natural hair revolution. I am not sure I agree with that. Revolution has been defined as a "forcible overthrow of government or social order", and that is not akin to what is happening all over the world right now. The conversion of so many black women from relaxed hair has been a slow one, but the inspiring thing is it's happening. Every day (I would hope), one black girl or woman decides to do away with the corrosive substance we've been slathering onto our fragile hair for decades, and everyday, we all become a little more beautiful. Do you have any idea how many black women are unaware of the fact that every one of us has a unique curl pattern? Tons! And it's because the second we see growth we straighten it (chemically or otherwise).

 I decided to go natural at the end of my freshman year in college. All my life, my mother relaxed my hair. She was always insistent on using a relaxer that was mild. She would then put my hair in rollers to make it look straighter. First year of college, I attempted to relax my hair by myself and my hair really thinned. That was the shock I needed to go natural. Sadly, that's how countless natural hair transitions start, and it shouldn't be like that. More women should simply be inspired shortly after seeing a breath-taking head of natural hair. Two months ago, when I removed my crochet braids, I was astounded by how big and beautiful my curly hair had grown. I had an afro the size of a beach ball and the ironic thing is I had always thought that would look ridiculous. It wasn't ridiculous, it was ravishing. Full, long, curly, bouncy...healthy. It was everything I ever wanted from my own hair and so much more. Maintaining long natural hair gets hard and sometimes you just want to go back, I know. Just know though, there are a multitude of reasons why you shouldn't.
"Natural Beauty"
    

Wednesday, July 4, 2012

Stop Wearing Weaves. Protective Styling is Key.

Check out Kimmaytube
on YouTube for some
cool protective styles!
Weaves are not your best friend. If you are making an honest effort to grow beautiful natural hair then do not consider the widely popular fake hair trend as the ideal protective style. I know about the dynamic state of fashion and beauty, as well as the creative spirit in all of us that just loves change. Believe me, I have been there. You've had curly/frizzy hair for eight months, religious tenacity when it comes to the tiresome regime that has since kept that natural hair in tip top condition, you walk into that beauty supply store and that pin-straight, waist-length, jet black weave is looking pretty darn good. It promises a break from the tiresome regimen, it promises change and, above all, light hair flying in the wind. Then the economist in you starts to wage a battle with the materialistic little sprite in you. "Come on! It looks fabulous! Wow! $230.00! But we could always reuse it...and probably wear it for a month...at least!" You want to buy it, I know. You probably shouldn't. 

You rock that natural hair girl!
Many misinformed individuals have been led to believe that weaves are a great protective style, and while they can be if used correctly and over a short period of time, more often than not, they are destructive.


First of all, when people first invest in a weave, they are loath to treat it like they would if it was their real hair. In an attempt to preserve the weave and keep it looking one-day old, they go for unhealthy periods of time without washing it. We are all familiar with the stereotype of an African-American woman with a weave, "patting" at it aggressively. Causing all sorts of brain-damage for temporary relief. It is a common sight and there are two things that it can be attributed to. One, the weave is sewn on so tight that it is causing irritation. To avoid ruining the tracks, the woman pats at the irritated areas instead of scratching them. The other potential culprit in this situation is stretched hair washes. I will call on a  favorite oxymoronic hair phrase of mine and say that her scalp is an oily desert- it hasn't seen water in eons, it is covered in clogged sebaceous glands and has an ever-increasing product build-up. As one can imagine, any hair in that condition has a markedly strong smell, often unpleasant. Don't be that girl. My freshman year of college was when I wore my first and last weave and, at the time, I really stuck to my weekly hair washes. Consequently, the weave had a short life and required regular straightening with a flat iron. Any girl looking to buy a weave has got to be willing to do that.

Another reason I am not the biggest weave fan is they cover your real hair for extended periods of time. Access to you hair is limited, leading to the debilitation of your natural, curly crown. It's important to be able to thoroughly cleanse your hair, and with a weave that becomes difficult. I call it the swimming cap effect. If you wore a swimming cap for an entire month, regularly shampooing the cap, the hair underneath would be in embarrassing condition when you finally pealed it off. In addition to that, the regularly application of leave in conditioner and other moisturizers that really helps your natural hair glow would have to be suspended.

The fake-it-or-break-it dilemma: to go with bangs or leave
hairline out...
Finally, there is the fake-it-or-break-it dilemma. If your not buying lace-fronts, then this is a problem you will face. In an attempt to make the weave look more legitimate, creators offered women all over the world three options: lace front, bangs or pulling out your hairline in order to cover the weave. The problem with the final two options is the very crux of the fake-it-or-break-it dilemma. Not a lot of women can pull off bangs. The number who think that they can is far greater than those that truly can. No one wants the whole world seeing their tracks so the bang women opt to fake-it. Over my years of observation (let's pretend I am a bird-watcher), I have found that the thinner the bangs, the realer they look. Sadly, a lot of "bangettes" try out the really thick bangs and end up hair that just looks bogus. It kind of defeats the purpose of a weave, don't you think? On the other hand, there's the more authentic looking option, which I call the "break it" option. You pull out a small amount of your own hair to cover the weave in front. It looks like you hairline so what's the problem? Well, it is something that exacerbates with the time you keep your weave on. The hair that you pull out, particularly if your dealing with a bone-straight weave, has to be regularly straightened so that it looks identical to the weave. In some cases, it has to be dyed. Both are very damaging to natural hair (and even relaxed hair). Repeated heat damage and damage due to exposure to the elements gradually shortens the hair that's left out. When you take off the weave, the difference between that hair and the hair that was underneath the weave will be striking. I do not have to tell you all that minimizing hair damage is the secret to growing healthy locks, and some of you may want to enjoy the healthy hair near your hairline before it starts receding.

Some of my favorite protective styles from left to right: Asian flat twist, twist braids, twist updo, crochet braids, flexi-strand extensions, twisted bun and 1940's style
When it comes to natural hair care and protective styling, the options are endless. One can try crochet braids, flexi-strand hair extensions, braids (not to thin), twists and more. A short search on YouTube will reveal that protective styling is something that can also be done with your own hair. If you like variety, look into them. Like me, you may gain a few skills.


Monday, June 25, 2012

Lavish Longer Lashes!

Most of the eyelashes in
mascara commercials are
fake. Sad truth.
So you don't exactly have the longest lashes and you always envy the 100% Spanish belles who don't need fake eyelashes to do the mascara commercials. Yep. That's right. If you didn't know this before, I am telling you now. Eighty-nine per cent of the eyelashes you will see in mascara commercials are fake. While your eyelashes give everyone less than 10 feet away the illusion that you have bona fied, thick and full lashes, they will never really look quite like the ad models'. It's time to face the fact that many of us aren't "born with it".

This odd-looking instrument may
be the answer to your prayers
So, my blog is about natural beauty, and this post will be about intensifying your natural allure. You will always have the option of buying fake eyelashes. However, for some reason, I never wanted to go down that route. Maybe it's because after bringing a guy home, I never wanted to traumatize him with the dramatic face alteration that accompanies fake lash and fake hair removal. Maybe it's because I never wanted to be in the middle of a great date when half of my eyelashes begin to fall into my eye as it twitches uncontrollably. (That actually happened to my roommate two weeks ago). Among my alternatives were eyelash extensions, which are a semi-permanent eyelashes, glued individually to your real lashes until the real lash falls out. The main reason this option was never explored was whenever the opportunity presented itself, my pockets were a little too shallow. They are costly! For a long time, I did nothing about my stubby eyelashes, which were constantly entangled with each other, pointing in all directions but the right one. Eventually, I stumbled on a lash-enhancing technique that worked for me and barely cost a thing: the eyelash curler.

All you need is mascara, a
curler and vaseline
I will admit when I first bought my eyelash curler, I had no idea how to  use it. I mean, it looked like a surgical instrument. I believe it reassembled what I had always imagined was use to pry eyes open and rip out eyeballs in horror movies. For a week, I used it the wrong way and when that wasn't successful I, stashed it away in a pile of cosmetics that would not be used for another year (I kid you not). It was only after I washed a "curler girl" commercial that I discovered my erroneous ways and pulled out the curler to use again. It only took a week of use for me to see a notable improvement in the aesthetic look of my lashes. The magic of the curler is that it leaves typically straight lashes curving outwards, giving the appearance of longer lashes. It also presses your lashes in a line, leaving disastrously messy lashes, like mine, uni-directional and neat.

I had to share this photo of an African girl with
fake eyelashes, taken by Luba V Nel. She is
breath-taking!
The correct way to use your eyelash curler is to, first, ensure that there's nothing on your lashes and they are dry. Back in my misguided days, I would use it after applying mascara. That actually damages your lashes. Never pull on the lashes, because rather than lengthening or curling them, it will just uproot them. Simply, keep your eyes half open and place your top lashes in the "clamp opening" of your curler. Beginning as close to the eyelid as you can, without pinching your skin, close the curler so your lashes are gripped in the clamp opening.  Hold it in place for 3-5 seconds without blinking. Why? Blinking will tug on the lash roots and high hair tension is your worst enemy. Never drag the closed curler over your lashes while holding it closed- that's pulling on your lashes! Unclamp, move the curler a little further down your lash and repeat clamping. That motion, of walking down the lash, rather than pulling down the lash, is a crucial skill to master. Once your are done curling, apply mascara. The difference will be conspicuous and you will have harnessed your lashes natural allure. Curling, I have found, doesn't have to be a daily thing. I imagine that incessant curling stresses the eyelashes and leads to damage. For the past month, I have only been curling 3 times a week and the results are undeniable. The rest of the week, I use mascara solo.

The results of a curler and mascara on real eyelashes
Finally, strengthening lashes is also important. One way to do it is to thoroughly remove the makeup on and around your lashes before bed. Once the lashes are completely clean, rub a dab (very small) amount of vaseline between your (also clean) thumb and index finger. Then, with the pad of your index finger, apply vaseline in the same way you apply mascara- i.e. underneath the top lashes, from root to tip. Don't rub! If you have too much vaseline on your finger, you will only get it in your eye and you do not want to err that way. Make vaseline-eyelash application a part of your make-up removal regimen and start enjoying that natural glamor in a few weeks.